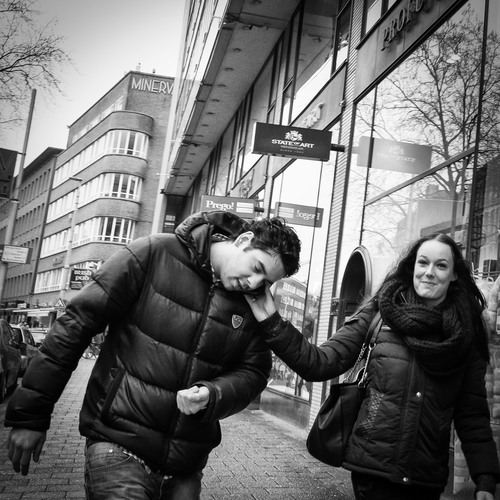
Although most people I know use auto focus while shooting the streets, there are two more techniques that are interesting to use: Zone focusing and Range focusing. In this article I will try to explain both techniques and the pro's and con's of using them. Prior to 1978 when Polaroid released it's SX-70 Sonar OneStep single lens reflex camera, there was no auto focus available and most street photographers used range focus or zone focus to get their images as sharp as possible. While those techniques will never produce the sharpness from using the auto focus, it does give you an "acceptable sharpness" which of course is a bit arbitrary. So why do I use it then? Auto focus tends to be way too slow for focusing on moving objects on the streets. Also if I see a scene evolving right before my eyes, auto focus can be a bit too slow and the moment has passed. By using the zone or range technique, I don't have that problem. 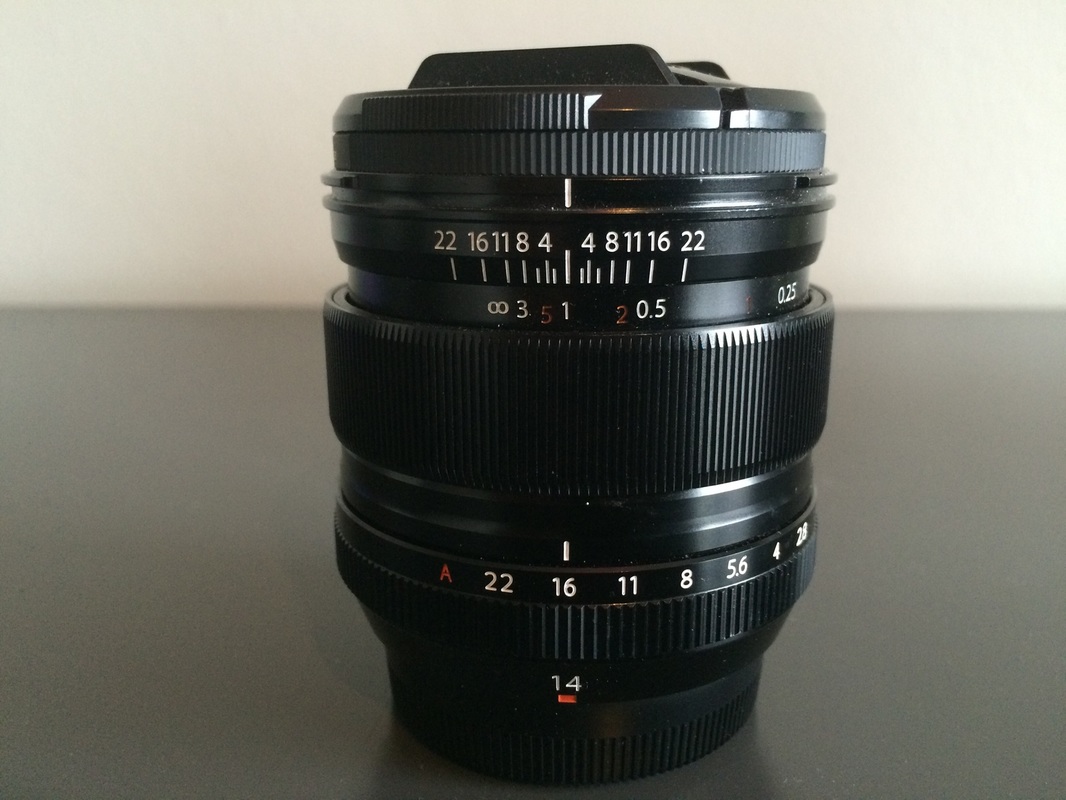 Fujinon XF14mm f2.8 - On the lower ring I set my aperture. In this case at 16... On the middle ring I set my distance to my subject which in this case I've set to 1 meter. Above that setting you can see that at f16 my focal range will be from 0.50 meter towards eternity. Fujinon XF14mm f2.8 - On the lower ring I set my aperture. In this case at 16... On the middle ring I set my distance to my subject which in this case I've set to 1 meter. Above that setting you can see that at f16 my focal range will be from 0.50 meter towards eternity.
What is zone focusing?
By setting my camera to manual focus and my aperture to a certain setting, I create a zone where everything will be in focus (approximately 90%). This can be from one meter away towards a maximum of two meters away, or 2 meter away towards a maximum of 4 meters away, etc. This sounds a bit strange, so let me clarify with an example using a DoF calculator (DoFmaster.com) where I use the Fuji X-Pro 1 which has the same crop factor (1.5) as my own X-T1. And use my Fujinon XF14mm lens which has a zone focus ring where I can set my distance to my subject and my aperture. 
So here you see that with my distance setting at 1 meter and my aperture at f8, I have a focal range of about 4.57 meters. If I'm at about 0.5 meter from my subject,
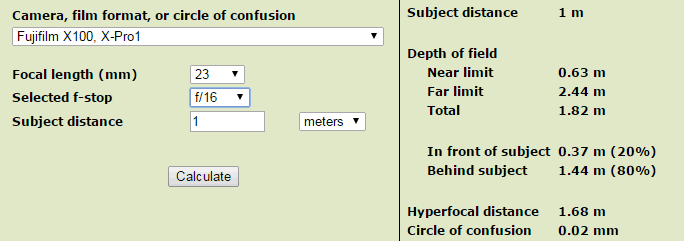
I can just click without focusing first and everything from that distance all the way up to approximately 5 meters away will be in focus. The wider I set my aperture, the less DoF or range I will have. If I apply the same settings on my Fujinon XF23mm, I will get a much more narrow range which is much more difficult to use. In order to increase my range, I have to increase my f-stop as shown in the two examples below. 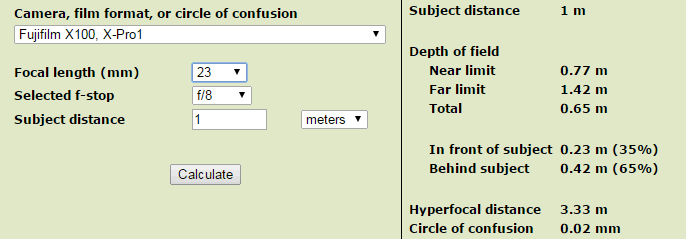
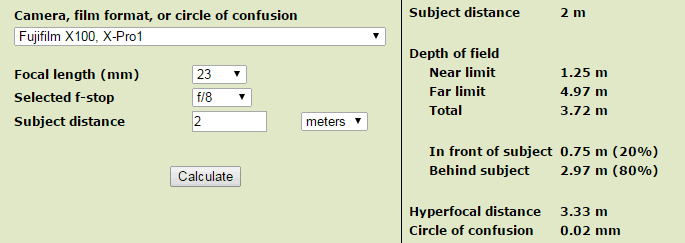
Increasing the distance to my subject on my focus ring will also increase the range as shown in the next example.
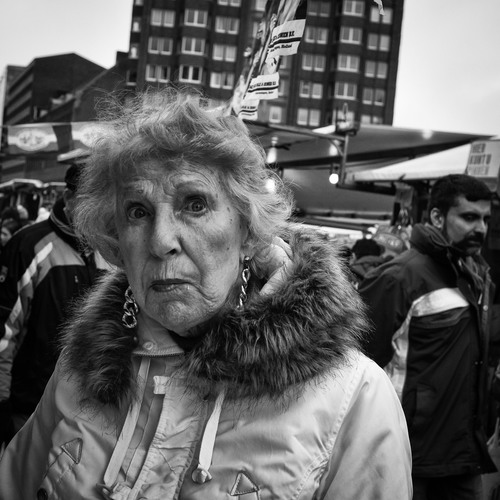
We Street 2015 - A Public Street Photography Book Project For You!
By Steven Gonzalez, Willem Jonkers, Arek Rataj, Sandra Jonkers 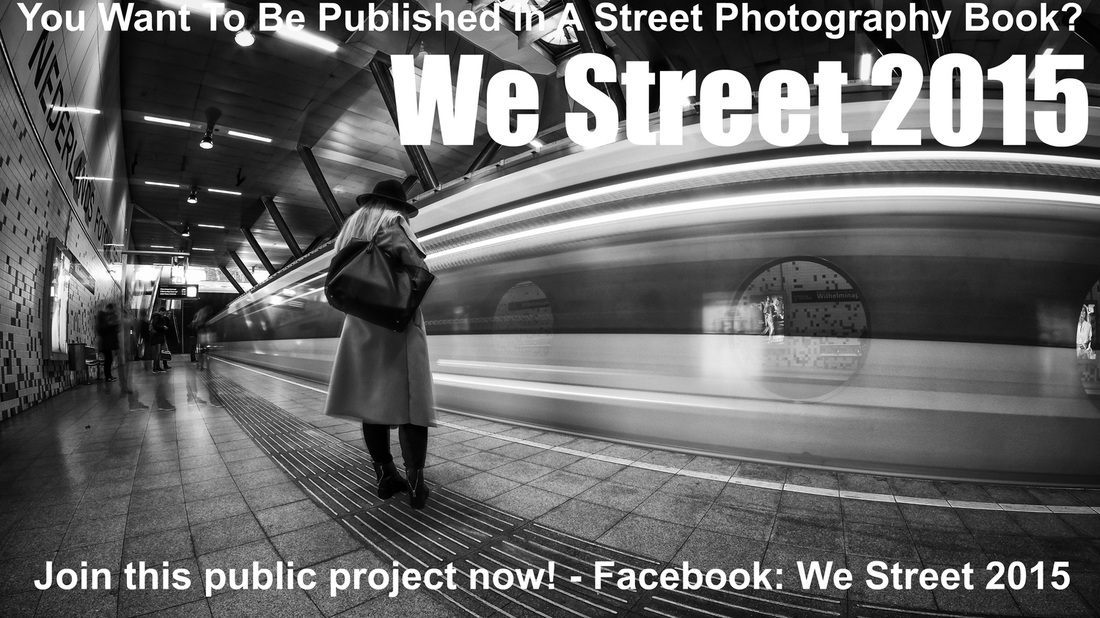
A maximum of three Photographs will be preselected
- Curated pre-selection of submissions by 4 curators - 100 shots will be selected, max. 1 per photographer - A HQ-book will be made publicly available for order - This is a NON-profit initiative! For more details please visit the Facebook group: We Street 2015 or Willem JONKERS blog: We Street 2015 - A Public Street Photography Book Project For You!
So in general, the less wide your lens, the more difficult it is to use this technique. At about 35mm (full frame) is the maximum focal length in which you can use this, but then you would have to take a larger distance from your subject or an f-stop at 16 to get a workable range. Using my 8mm lens which has no auto focus, I just can set my f-stop at whatever I want, because that lens is so wide, everything will be in focus from a distance of 30cm and beyond.
Using this technique with a wide open aperture, you better know how to estimate the correct distance or else everything will be blurry. If you use a 23mm (35mm on my crop of 1.5) and an aperture of 1.4, you'll have a 60cm range which will be in focus, so you'll have to be very close. Usually I use f8 or higher on my 14mm with 1 meter distance or f16 at my 23mm with 1 meter distance. Just to be on the safe side...
What is range focusing or hyper focal distance?
When I set my lens distance at eternity, I will have a minimum distance towards my subject from where I can shoot (depending on my aperture setting). In the above examples you can see the hyper focal distances as well. Basically, from the minimum distance towards infinity will be sharp. This is an ideal way to go on the streets if you don't want a shallow DoF. Pre-focusing Sometimes if I see a nice background, I pre-focus. This is fairly easy by focusing (withing the range of my settings) on the background and wait until an interesting subject passes by to take the shot. Just focus on a point where you expect the subject will pass and take the shot as it happens. 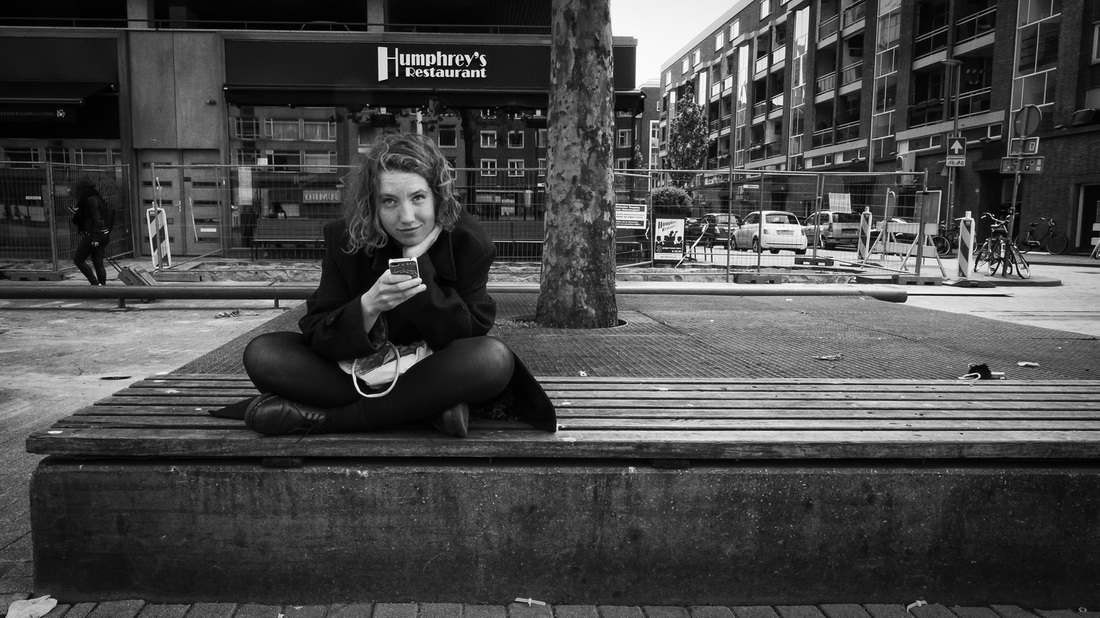
4mm - f16 - 1/400 - iso 2500 | Hyperfocal technique |
Why use manual techniques?
Hope to have given you fellow street togs something inspiring or maybe you already knew all this, but still liked to read it just to freshen up a bit. Feel free to contact me through the contact form, in the comment section below or through Facebook. Have fun! Willem
If you like to read more exciting and informative stories by Willem, please visit him at:
http://www.willemjonkers.com Or visit him on Facebook: www.facebook.com/willemstreets
1 Comment
by Alexander MERC, August 2015
Although everyone can hold a camera or cellphone and take photos, not all are the same when it comes to shooting street photography, aren't we? Of course, we are!
If you look at photos at different photography groups in the social networking site, you'll be amazed with the various style, forms and character that are out there. We see some are beautiful, some are ugly; some are funny, some are sad; some have story, some have none; some have people, some none; and so on. This is because street photographers have different level of skills, different understanding of meaning of street photography, different personality, different taste, different place or country, etc.
Here's my own little list of different types of street photographers:
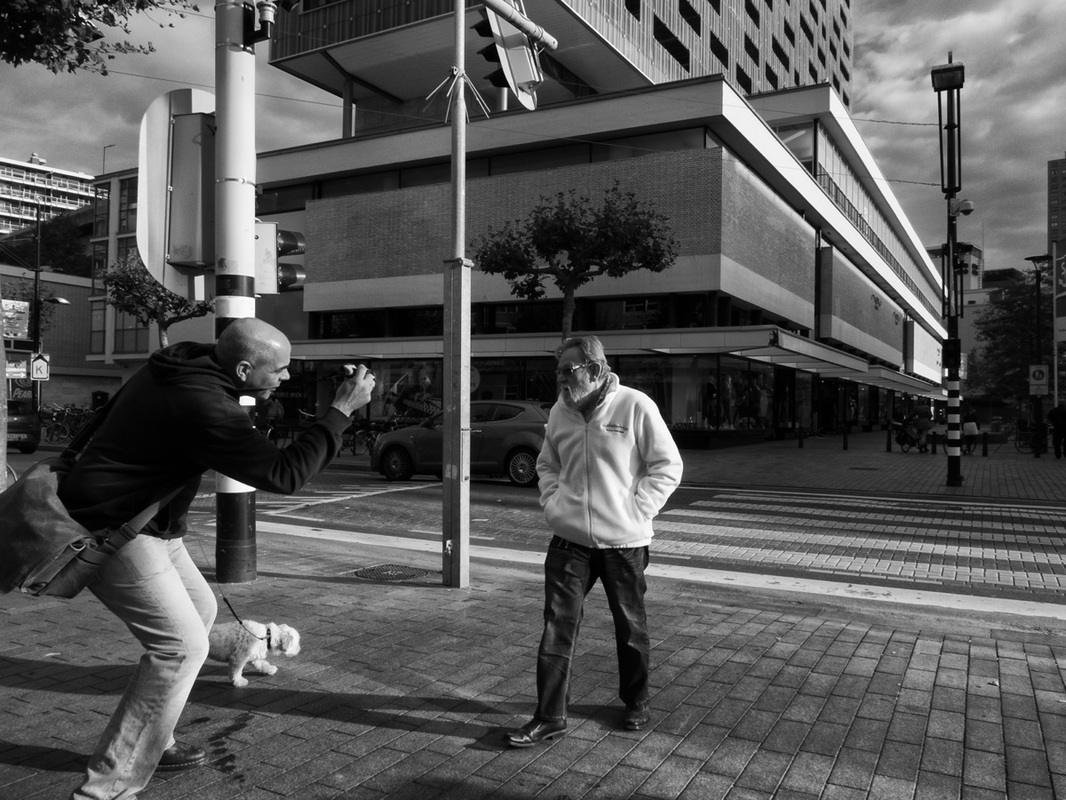
1) Expert - These are street photographers who are very confident and knowledgeable of their niche. They managed to spread the word about street photography through their blogs and videos and held workshops and teach their methods and styles. These types of street photographers seldom post photos in social networking site, though. 2) Purist - These are street photographers who set their own rules and guidelines--- no long lens, no back of people photos, no homeless, beggars, children images, no street portrait, no post processing. Purists are very choosy about their subject but very serious street photographers. 3) Aggressive - These are street photographers who have no qualms in invading the personal space of people. They poke their cameras in front of your face whenever and wherever they like it. These type of street photographers have guts and very brave and mostly, have very good social skills. 4) Timid - Timid street photographers prefer not to be seen or visible when on the streets. They are very patient and willing to wait and wait until that "decisive moment" unfolds to their eyes. These types of street photographers are more perfectionist than the aggressive ones. 5) Wannabes - Sometimes called beginners, these types of street photographers shoot whatever (with people or without) or wherever (in public or private place) they like. They usually have sophisticated gears but mostly shoot in auto mode. They also read lots of manuals, books and blogs but often break the rules. Their biggest fans are their family and friends. 6) I-phonist - These street photographers don't want to carry their bulky cameras around, their shoulders hurt. They are more comfortable using their cell phones because they are less noticeable with it when shooting in public place. These type of street photographers post more photos in social networking site than their counterparts. 7) Fly-by-night street photographers - These are come and go street photographers. They join photographers group in social networking site but don't post so many photos there. When they don't received so many "likes" or favorable comment they quit easily. Different authors have different ways of categorizing street photographers and /or their photos. Look at the myriad of photos being posted at various street photography groups in the Internet and you'll be surprised how different we are all! Cheers! Alexander MERC |
Alexander MERCPhotographer and columnist @ EYE-Photo Magazine, based in Ottawa, Canada Archives
October 2015
Categories |
 RSS Feed
